The Halo: Custom Edition game (Halo CE) is a free unsupported upgrade and standalone program that will install alongside Halo PC. The Halo CE game allows you to play custom maps. All map files and utilities on this website are for Halo CE. Currently, the preferred configuration of Halo CE should include the game modifications HAC and Chimera. These modifications allow for many additional features such as map auto-downloading and other improvements.
Once you have obtained a copy of Halo PC, you can then install Halo CE. After installation is completed, you should update to version 1.10.
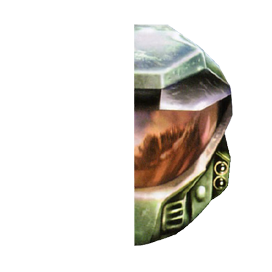
To enable Halo's command console, right click on the Halo Custom Edition Icon on your desktop and select properties (see image). In the target field of the properties dialog box you will find the following:
"C:\Program Files\Microsoft Games\Halo Custom Edition\haloce.exe"
Change this to read:
"C:\Program Files\Microsoft Games\Halo Custom Edition\haloce.exe" -console
Halo's chat system may not initially work correctly, to fix this install msxml parser 4.0 and/or use the custom chat provided by HAC2 (console command: custom_chat 1). DirectX 9.0c should have been installed with Halo but in case it wasn't, you will need to do so yourself.
Once HAC and Chimera have been downloaded, their files go into Halo CE directory/controls/. Here are some commonly used commands. See more commands in their readme.txt.
*Press ~ while in the main menu to open the console. Ctrl+C a line into your clipboard and right click while the console is open to paste it:
- command redirect_kill_feed 1
- chimera_block_mo 1
- chimera_block_zoom_blur 1
- chimera_widescreen_scope_mask 1
- chimera_interpolate # (0-9)
- chimera_skip_loading 1
- chimera_af 1
This guide covers the steps involved in configuring a controller for Halo PC. This guide will be split into two parts (for general configuration and for Chimera configuration).
Requirements:
For original Xbox controller:
- Female XBOX Controller to PC USB Adapter Cable (needed in order to plug the controller into your computer)
- XBCD Driver & Utility (used for applying trigger threshold & right stick deadzone)
- Xpadder Utility (used for mapping movement controls to left stick, applying left stick deadzone & diagonals, directional arrows to D-Pad, and Pause button to Back button)
For wired Xbox 360 controller:
- XBCD Driver (optional - overwriting the default Xbox 360 controller driver will break compatibility with other games; install ONLY if you are using the Xbox 360 controller solely for Halo) (can be used for same as original Xbox controller)
- Xpadder Utility (used for same as original Xbox controller)
For Xbox One controller
- Xpadder Utility (used for same as original Xbox controller)
About Chimera
NOTE: This mod is not yet public and is undergoing constant changes. For the latest functionality, ask in the Discord group.
Chimera is client mod that must be installed in order to take advantage of new in-game controller support functionality, which removes the need for third-party utilities (ex: setting deadzones). This new functionality will only work in servers with Chimera’s server-side counterpart installed.
At the time of this writing, these are the features of Chimera’s controller support:
- Set a left-stick deadzone in-game via console command
- Variable movement speed
- Full directional movement
- Input device detection
- Automatic activation & improvement of player_magnetism command
Original S Controller & Duke Configuration:
Getting Started:
- Connect the controller to your computer
- Open Device Manager (Control Panel > Device Manager) and ensure that no driver is installed by default. It should show up as “Unknown Device”:
- Download and install the XBCD package from here: http://www.redcl0ud.com/xbcd.html
- This will install the driver utility to C:\Program Files (x86)\XBCD and the driver files to C:\Program Files (x86)\XBCD\Driver (default)
- During installation, when prompted, select “XBCD Drivers Only” from the dropdown menu.
- After the package is installed, the Device Driver Installation Wizard will open. However it will fail (this is expected). Click Finish to exit.
- Next, install the driver itself. Since the driver is not digitally-signed, Windows’ Driver Signature Enforcement must be disabled. More information about Driver Signature Enforcement here: https://www.quora.com/What-is-Windows-driver-signature-enforcement
- The method for disabling Driver Signature Enforcement varies depending what version of Windows you use. For Windows 10, see Step 5. For windows 7, see Step 6.
Disabling Driver Signature Enforcement (Windows 10):
- Hold the Shift key and click Restart in the Start Menu
- On the next screen, select Troubleshoot:
- Select Advanced Options:
- Select Startup Settings:
- Click Restart:
- After rebooting, press 7 to boot with Driver Signature Enforcement disabled:
XBCD Driver Installation (all versions of Windows):
- After Windows has started up, open Device Manager (Control Panel > Device Manager), right-click on your controller (Unknown Device) and select Update Driver:
- Select “Browse my computer for driver software”:
- In the “Search for drivers in this location” field, enter the path to the Drivers subfolder in the XBCD installation directory. By default:
- Click Next. A warning will appear to inform you that the driver is not signed. It is safe to ignore this warning. Select “Install this driver anyway”:
- You should then see the following window. Click Close:
- To verify that the driver has been installed correctly, look for your controller in Device Manager under Human Interface Devices. It should be named XBCD Xbox Controller:
- Driver installation is complete. Proceed to Configuration of XBCD Device Profile.
Configuration of XBCD Device Profile
- Launch the XBCD Setup Utility as Administrator:
- The utility should detect input from your controller:
The XBCD utility is ONLY used for:
- Trigger threshold (aka deadzone for the triggers)
- Right stick deadzone
- These are the recommended settings:
- Click Apply and Save your profile for future use. You can now exit the utility (it does not need to be running for the settings to take effect). If you want to verify if your settings are applied to the controller, simply re-launch XBCD Setup Utility as Administrator and check if your settings are still applied.
Xpadder Utility Installation & Configuration:
- Download Xpadder from http://xpadder.com
- Create a new folder in a location of your choice and move the newly-downloaded Xpadder.exe into this folder. The software does not have a traditional installer. It is recommended that you create this folder somewhere in your user folder (ex: Desktop, Documents, etc) and make a shortcut on your desktop.
- Run Xpadder as Administrator:
- There are several prompts that appear the first time you launch the program. In order, click Start, Start, Start, Start, Start, Program Location, Associate.
- In Xpadder, click the left menu button and Select New… :
- You will need to download a controller image for the device profile setup. http://xpadder.com/forum4/viewtopic.php?f=199&t=5599
 Halo 1 Hub